Drilling projects live and die by their budgets and schedules. One of the ongoing challenges is balancing the cost of drill bits against their performance – in terms of both drilling speed and lifespan. It’s tempting to always buy the “best” (often most expensive) bit for maximum performance, but that isn’t always the most economical choice. Conversely, opting for the cheapest bits can backfire if they wear out or break quickly. In this article, we’ll examine how to evaluate cost vs. performance for DTH bits, and strategies to find the best value for your specific drilling needs.
Understanding Bit Costs
First, let’s clarify what we mean by cost:
- Initial Purchase Cost: The price paid to buy the bit. Premium bits can cost significantly more – sometimes double – the price of a basic bit of the same size.
- Operational Costs Related to Bits: This includes the cost of downtime to change bits, the labor involved, and any ancillary costs like sharpening, or fuel use differences if a bit changes drilling dynamics.
- Cost of Bit Failure: If a bit fails catastrophically (e.g., shank breaks off in the hole), the cost can skyrocket due to fishing it out or even abandoning a hole.
When we talk about performance:
- Rate of Penetration (ROP): How fast can the bit drill (meters per hour).
- Bit Life (Meters drilled per bit or hours per bit): How long it lasts before it must be replaced.
- Hole Quality: Does the bit maintain gauge and straightness – poor performance here can add costs later (e.g., reaming or extra casing).
The goal is to minimize the cost per meter drilled, while meeting project requirements for time and hole quality.
When to Invest in Premium Bits
Premium DTH bits often use better materials or design to achieve longer life and/or faster drilling. They might have:
- Higher grade carbides or more carbides (for longer wear).
- Special face designs to drill faster in certain rocks.
- Stronger steel or hardfacing (to prevent body wear).
- Precision manufacturing for perfect balance (reducing vibration).
These features raise cost. So, you should invest in them particularly when:
- Drilling in very hard or abrasive conditions: A cheap bit might dull or erode so fast that you go through multiple bits where one premium bit would have sufficed. For instance, if a standard bit drills 100 meters before wearing out and a premium bit drills 300 meters but costs 2x, the premium bit is giving you 3x the meters for 2x the cost – a clear win in value.
- Remote or Difficult Access Projects: If you’re drilling in a location where changing bits is very time-consuming (like a deep well, or an offshore platform, or simply a remote site where deliveries are slow), bit life has extra value. Using the longest-life bit (premium) reduces the frequency of trips or shipments. The cost of an extra day of rig time far outweighs saving a few hundred dollars on a bit.
- When Drill Speed is Critical: On projects with tight deadlines or high rig costs per hour (like large mining operations or costly drill rigs), a bit that drills even 10% faster can justify a higher price. For example, if a drill rig costs $500/hour to operate and a better bit saves an hour for every 10 hours of drilling, over 100 hours that’s 10 hours saved = $5,000. If that bit cost only $500 more, it paid for itself many times over.
- High Risk of Bit Problems: If using a cheaper bit has historically caused issues (like bits breaking, getting stuck, or causing deviations that require redrill), then the risk cost should be factored. Paying more for a sturdier bit that avoids those problems is worth it.
Calculation Example:
Suppose Bit A costs $1,000 and drills 100m before replacement. Bit B (premium) costs $1,800 and drills 200m before replacement, and also drills 15% faster. If you need to drill 1,000m:
- Using Bit A: you need 10 bits = $10,000. And no speed boost.
- Using Bit B: you need 5 bits = $9,000, and you finish 15% faster (which could save significant rig time). Here, Bit B is clearly better value (cheaper overall and quicker).
Of course, if Bit B only drilled 150m for $1,800 vs Bit A 100m for $1,000, the pure cost per meter is same ($10/m). Then you’d consider the speed: if Bit B is faster, it might still win; if speed is same, maybe go with cheaper Bit A in that scenario.
When to Save Money with Standard Bits
On the flip side, a budget bit might be perfectly adequate or better in cases like:
- Soft or Non-abrasive Rock: If you’re drilling in a material that doesn’t really challenge the bit, an expensive heavy-duty bit’s extra features won’t be utilized. You might achieve similar meters with a basic bit. For example, drilling in a soft limestone – you might get 1,000m out of a mid-grade bit versus 1,200m out of a premium. The cheaper bit likely has a lower cost per meter in that case.
- Short Projects or Shallow Holes: If the total drilling length isn’t much, the difference between bits in terms of total project impact is small. If you only need to drill 50m for a house foundation, buying a top-of-line bit that could drill 500m is overkill – you won’t come close to using its capacity. Several lower-cost bits could do the job fine and the slight performance differences won’t have time to manifest significantly.
- Very Homogeneous Conditions: If there’s low risk of unexpected issues (no alternating hard/soft, no high abrasion zones suddenly), then you can plan bit usage pretty tightly and perhaps use bits just until slightly worn and swap – an approach sometimes used in large operations: use medium-cost bits but change them out proactively to avoid failure. This can be more cost-effective if you optimize the change schedule well.
- Training or Risk of Damage from Operator Error: Oddly, sometimes you may not want to give an unproven crew the most expensive bits – if there’s a high chance they might misuse or damage them, you’d rather they do that on cheaper bits while they learn.
Calculating Cost per Meter (or per Foot)
A key metric is cost per meter drilled for bits. To calculate: Cost per meter=Bit purchase costMeters drilled by that bit.\text{Cost per meter} = \frac{\text{Bit purchase cost}}{\text{Meters drilled by that bit}}.
However, this is a simplification. A more complete cost per meter might include:
- The cost of bit, plus cost of any sharpening done (time & tools).
- Portion of labor time for changing bits (if it’s significant).
- For large projects, maybe even the inventory carrying cost (money tied up in bits stock).
But usually, just dividing cost by life is a good start.
Make sure to use average life if you have multiple bits. One bit might fail early due to a manufacturing flaw or bad luck hitting a void – don’t judge solely by that one if others performed better. Conversely, one bit might unusually last extra-long (maybe drillers got lucky with how it wore) – consider that a bonus, but not guaranteed next time.
Table: Hypothetical Cost-Performance Comparison
| Bit Type | Cost Each | Avg Meters Lifespan | Cost per Meter | Notes on Performance |
| Economy Bit | $800 | 80 m | $10/m | Drills slower, needs sharpening often. |
| Standard Bit | $1000 | 100 m | $10/m | Baseline performance. |
| Premium Bit | $1500 | 180 m | $8.33/m | Faster ROP + longer life. |
| Ultra Premium | $2000 | 240 m | $8.33/m | Very long life, but ROP similar to Premium. |
In the table, the Standard bit and Economy bit actually have the same cost/m, despite one being cheaper – because it also drills proportionally less. The Premium and Ultra Premium have better cost/m, but Ultra’s improvement is only in life, not speed (if ROP is similar, the extra cost didn’t reduce cost/m further, it just means fewer bit changes).
If the Ultra Premium had a faster ROP, it might justify its higher cost with rig time savings even if cost/m was equal to Premium.
Looking Beyond Cost: Reliability and Risk
It’s worth noting that consistency and reliability are also part of performance. You might have a cheaper bit that usually drills 100m but occasionally fails at 50m unpredictably. And a premium bit that almost always hits 180m without fail. Consistency can save headaches, and in critical projects, reducing the risk of a bit failing early might be worth paying extra.
Also consider hole quality/correctness as a value factor. If a premium bit keeps the hole straight (saving time and materials later) or holds gauge better (ensuring your casing fits without reaming), those are cost savings that don’t show up in a simple $/m calculation for the bit, but affect overall project cost.
Tips for Optimizing Value
- Track Your Bits: Keep good records of how each bit model performs in your conditions. Over time you’ll see patterns and be able to choose the best value option by data, not just initial price or marketing claims.
- Apply the Right Bit to the Right Zone: If your drill hole passes through varying conditions, you could use multiple bits optimized for each. It’s not uncommon in some drilling to start with one bit for surface/overburden, switch to another for the main hard zone, and maybe even a third for an extremely abrasive section. Though each bit might cost money, using them where they perform best maximizes overall efficiency.
- Consider Reconditioning: For large bits (like >8 inches), some companies recondition bits (weld on new steel, insert new carbides). This can lower cost per meter if done effectively, as a refurbished bit might cost 50% of new but give maybe 70-80% of the life of new. The economics depend on reconditioning availability and cost.
- Bulk Purchasing and Supply: Sometimes you can get better pricing per bit by bulk ordering. If you’ve identified the ideal bit model, buying a larger quantity can bring unit cost down and improve your cost per meter.
- Avoid False Economy: Using a bit too long to “get every last inch” can be false economy. A worn bit drills slower and can stress the hammer. It might even fail and cause more loss. It’s often better to pull a bit when it’s effectively worn out but before it’s completely spent. That last 5-10% of life might not be worth the reduced performance and higher risk. Better to start fresh and drill faster again.
- Trial New Technology: Keep an eye on new bit designs or innovations (as discussed in the previous article). Sometimes a new bit might carry a premium, but if early adopters report significantly better performance, trial one yourself. Conversely, if a new budget option appears, test if it holds up. Continual optimization is key.
Real-World Scenario
Imagine a contractor bidding on two jobs:
- Job 1: 100 holes, 20m each, in medium-hard non-abrasive rock (total 2000m).
- Job 2: 10 holes, 50m each, in hard, abrasive rock (total 500m), with strict timeline.
For Job 1, medium-hard and non-abrasive, standard bits or even slightly cheaper might suffice. ROP isn’t critical, and bit life is fairly predictable. The contractor might choose a reliable mid-range bit and maybe need 20 of them to complete (cost for bits maybe relatively small compared to rig time).
For Job 2, hard and abrasive plus timeline, the contractor might invest in top-tier bits and hammers to maximize drilling speed and minimize bit changes (since each change in a deep, hard hole is time lost). They might even overbuy a couple of spare premium bits to ensure they don’t have to stop if one bit doesn’t make the expected meterage. The bit cost is higher, but finishing on time avoids penalties and yields client satisfaction (possibly bonuses).
In bidding, the contractor factors these: Job 2’s bid would include the cost of premium bits and perhaps more contingency for tool wear, but it’s necessary.
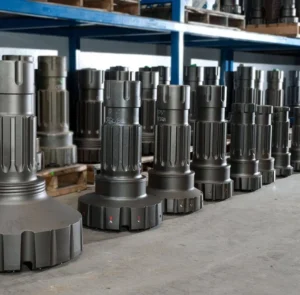
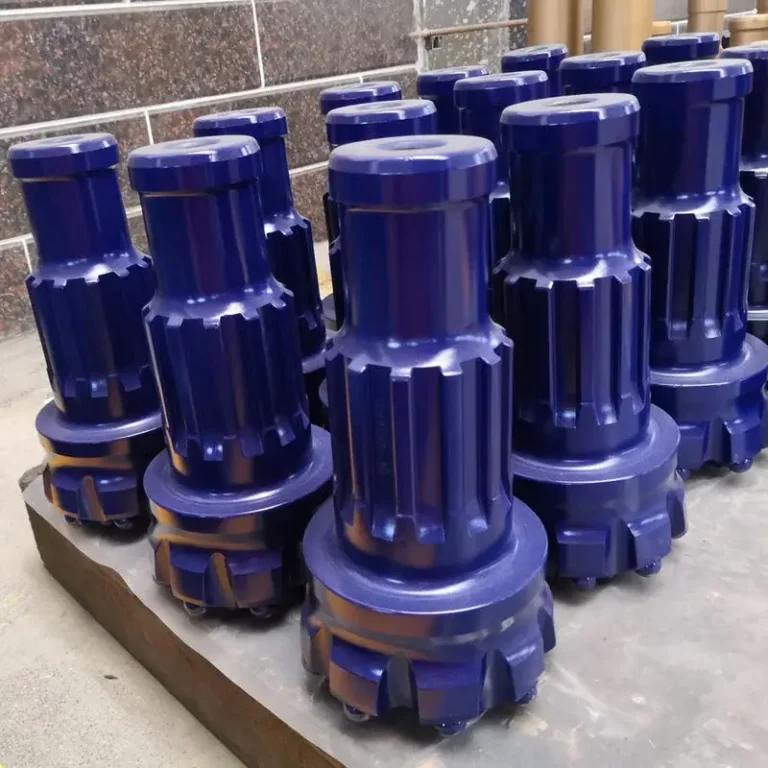
(Best Practices for Maintaining DTH Drill Bits) Inventory of DTH bits: drilling operators often stock a range from standard to premium bits. Selecting the right bit for the job can greatly influence overall drilling cost-efficiency.
Conclusion
Finding the best value in DTH drill bits is a balancing act. It requires understanding your drilling conditions in detail, knowing the capabilities of available bits, and sometimes doing your own tests to gather performance data. The cheapest bit isn’t always the most economical, and the priciest bit isn’t always necessary for the job at hand.
The optimal choice is the one that gives you the lowest total cost for completing the job to the required standards. This often means the lowest cost per meter drilled when considering both bit life and influence on drilling speed. But remember to include those hidden factors: downtime, risk of failure, and any effects on subsequent operations (like hole reaming or casing).
By being strategic in bit selection – possibly even mixing and matching within a project – you can ensure you’re not overspending on bits, but also not losing money due to poor performance. Keep good records, learn from each project, and maintain a good relationship with bit suppliers (they often can suggest the most suitable product). With this approach, you’ll drill more meters for less money, boosting the profitability of your drilling operations.